Friday, March 30, 2012

Freebie Friday


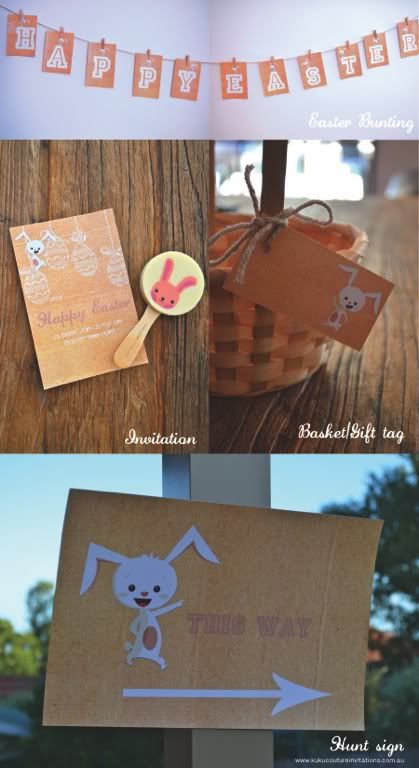
In honor of Easter's coming- I found this adorable easter party kit! Complete with signs, decorations, tags, etc! Thank you to Julia KuKu Parites.

"I am so excited to be planning my little boy’s first Easter egg hunt. Last year he was only eight months old so he wasn’t really aware of what was happening as his cousins participated in a hunt in our backyard.
This year though he will be 20 months and hopefully a little more keen to participate in the fun.
I have designed some pretty printables to use on the day.
Photobucket
You Can download, print, cut and Enjoy the Easter Egg Hunt Kit Here."

Thursday, March 29, 2012

Thrifty Thursday!

So I stumbled across the coolest little shop online today while, I admit it, I was searching for dachshund puppies : ) 


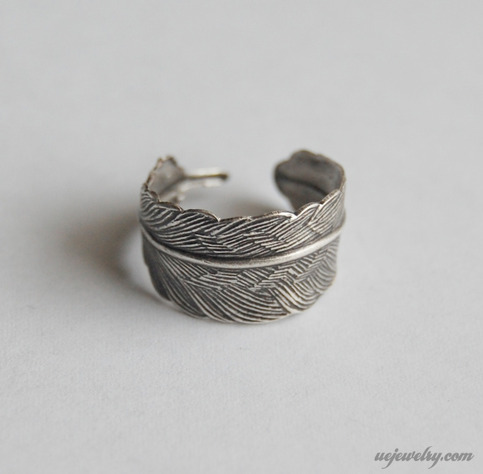
I love this ring! Unexpected Expectancy $16.50

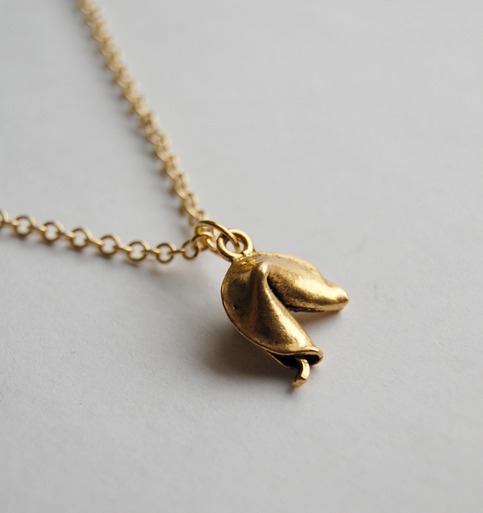
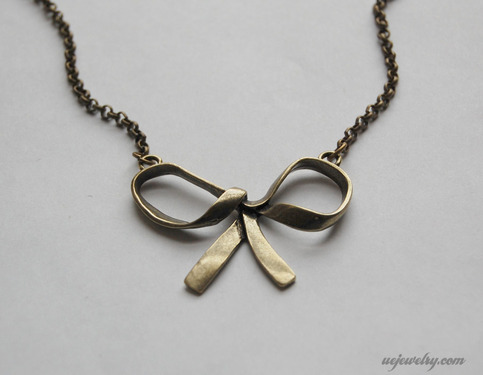
Necklace Unexpected Expectancy $14

Necklace Unexpected Expectancy $14

Necklace Unexpected Expectancy $14.50

I have ALWAYS wanted a ring like this!!!! Unexpected Expectancy $11


Check them out! All their jewelry is so cute.


Wednesday, March 28, 2012

Wedding Wednesday


These are SO cute- I can't wait to make these myself! They're from WeddingChicks

It is more than acceptable to take your friends to lunch and ask them to be your bridesmaids. Or you can get crazy and whip a fabulous little box full of delightfulness like   Most of her bridesmaids-to-be lived far from her. Given how very much they meant to her, she did not want to text them and ask them to play a major role in her wedding.


 had a great “Will You Be My Bridesmaid?” project. She went down to her local JoAnn’s and bought some unfinished Cigar boxes. You can buy them online for $3.49. She then painted them a sweet cream and blue Bahama. Wonderful wedding colors as well. Don’t you think?
The outside of the box got two to three coats of light ivory to cover up the natural wood aura, and inside was treated to one layer of ivory, too. After that dried  attacked the inside lid with a pencil, and free handed the bracket. We suggest downloading the template here and tracing.
 used a few sets of playfully calligraphic adhesive letters. You can pick those up at your local craft store. Before filling it with goodies used two coats of satin varnish, even over the letters.


Then it was time to tackle the contents. The bottoms got lined with vintage handkerchiefs.
 wanted to lay out all the details about the wedding. She purchased scalloped A6 postcards and laid out all of her info in Word, making sure each postcard was progressively longer, allowing her to cut, then bundle. If you click on the photo you can read all of her wording to get more of an idea.


In the boxes, she placed photos of an inspiration board and paint chips to show where she was going with her color scheme. This is such a fun and unique way to ask your favorite ladies to be part of your special day. A lot of work is involved, but your besties will love it.


To learn about  wedding you van visit her blog Rinse. Repeat. We would love to know how you plan on asking your bridesmaids. Do share the details with us by leaving a comment below.

Tuesday, March 27, 2012

Welcome to Tutorial Tuesday! I've been excited for this weeks segment- I found the most adorable tutorial at FellowFellow.com last week. Enjoy!

Sweet DIY Votives

Posted on September 27th by ffadmin | 
Here’s what you’ll need:
1. Measure the height and circumference of your jar, and cut strips of fabric to roughly fit (approx. 1cm wide – doesn’t have to be perfect).
2. In your small cup, pour in some glue and dilute it with a bit of water (about 1:2), mix well. It should be the consistency of slightly thicker water.. yes, I know I’m being vague but it shouldn’t make much difference to the end result.
3. Submerge your first strip of fabric in the glue. Once soaked, lightly run your thumb and forefinger down the strip to get rid of any excess glue.
4. Place the strip into your jar (pattern side facing the jar) and position it. Use your paintbrush to push any air bubbles out from between the fabric and the jar.
5. Repeat with the rest of your fabric. Allow to dry overnight before using.
Note:
- It would be best to use battery operated tea lights instead of real candles
- I find that it’s ok to have fabric going above the top of your jar because it can be easily cut off after it’s dried.
- I don’t mind the look of the overlapping lines of fabric once the candle is lit, but if you do try not to overlap the strips in the gluing process.

** I’m just going to add this little disclaimer… please be careful! Even though I’ve used real candles in my jars, it would be better to use battery operated tea-lights. If you do decide to go with real candles, make sure your jar is big enough that the candle has plenty of room around it (the bigger the better), with no chance of the flame touching the fabric. Make sure the glue is dried overnight before using the votives, and keep an eye on them – if you see any signs of them starting to burn, stop using them immediately! **"


Monday, March 26, 2012

via: decor 8

Within the year, I'll be moving out of my house and in with my new  husband! As a photographer, having a good workspace/office is key! So I've been on the prowl to find great office space ideas for when I work from home! Though, my dreams is to eventually own my own studio.

I really want somewhere light and airy! via: houzz

Loving the rug! via: thedecorista

Giant Chalkboard Calendar!!! via: stylizimo

This year, for some unknown reason, I've really started to fall in love with pastels- the hardwood floor in here mixed with the pinks and blues- sigh.  via: the savy photographer

On the other hand, who wouldn't want these bright colors in their workspace!!! via: lystav

So simple! via pinterest

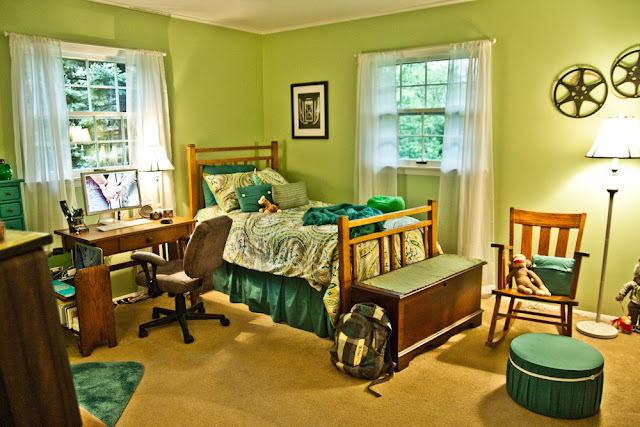
and with that, this is my current office- my bedroom at home! I like it :)


I really like my little place to put my laptop- might have to bring this along with me to my new apartment!


Friday, March 23, 2012

Freebie Friday


It's Freebie Friday! This Friday I've scrounged up some free printables- they're so adorable!

This is a easy stencil to transfer to a canvas!  via: pinterest


Cute little calendars! Via A Pretty Life


Birthday Calendars!!! via The Pretty Blog

Watch how much water you drink! Via Flickr

Thursday, March 22, 2012

Map envelopes! (For invitations?) via etsy


So, Caleb and I really like the idea of having some sort of travely-destinationy type theme for the wedding since everyone, including us!, will be traveling up to Valpo for the ceremony. So I've been scouring through etsy for some great map things and came across these that are currently up for sale! :D

cute little thank you tags! (Possibly for favors?) via etsy

Cupcake holders!!! Brilliant! Via etsy

And for on top... :) via etsy

Pinwheels for the centerpieces. Paperairplanes would be cute too! via etsy

Itty Bitty little wooden heart with whatever location you'd like in the center! I wonder if this would make a good boutonnière alternative? via etsy

Little journal! Guestbook? via etsy

This announcement is so cute if we move somewhere! Or simply to share our new address- i love getting mail :) via etsy

I love love love this!!!! Wedding invite made to look like a map!!! So considering this! Would be easy and probably cheaper! via etsy

This shop will make you a print with your origins or simply where you live! I like the idea of having a heart over Valpo since it's where we met. via etsy